Friday, November 15, 2013

Smoke Effect Photoshop

Create a realistic Smoke effects with the Photoshop CS6 elements. This does not require much time like the readers think. There are many ways to do this, but I will teach the easiest way. Ok, so let’s get started.!


1st Step : Open up your picture by going File/ Open.


NOTE: When choosing your picture, it’s better for you to take a photo with Black background.


2nd Step : Grab the brush tool and make sure that White is your foreground color.


3rd Step : And also make sure that the Opacity is above 50% and  in the brush Presets check shape dynamics and smoothing.


4th Step : Now Create a New Layer by going Layer/New/Layer.


5th Step : Now start coloring as I did in the picture. Change the brush size according to the size of the picture.


6th Step : Don’t be worried about how it looks now, it will be better later on. After coloring Press Ctrl + T and Press the wrap tool.


7th Step : Now wrap the smoke until it perfectly matches the tea cup and then press Enter.


8th Step : Now go to Filter/ Other/ Maximum.


9th Step : And then a dialog box appears, adjust the radius of pixels until it perfectly matches for you in the form of a real smoke.


Again if you’re not satisfied with the shape of the smoke you can again Wrap it by Pressing Ctrl + T.


10 Step : Now we’re going to add some smart filters for our smoke for doing that go to Filter/ Convert to smart filters and click Ok.


11th Step : Now go to Filter/ Blur/ Surface blur.


12th Step : After that a dialog box appears, adjust the Radius and Threshold until it perfectly matches the smoke. I’ll be using Radius 17 and Threshold 41.


13th Step : Now you’re done you can save up your image by going File/ Save as.


If you have any doubt please feel free to comment, I’ll be helping you J

Friday, November 8, 2013

Age Progression Photoshop

Today we are going to learn the Age progression tutorial in Photoshop. I’ll be using Photoshop CS6 . This will work in almost all the versions of Photoshop. You can see how you look like in your 60s and 70s. Its very simple and takes less time for you to do this. So let’s get started..


So let’s get started..


1st Step : Open the Image.
Open up the Image which you are going to do a Age Progression by Pressing 
File > Open or just by Pressing Ctrl + O.


Image Credits Pixabay.com


2nd Step : Insert Guide Lines.
You need to insert Guidelines to the Image. For that go to View > Insert Guideline. Make sure it is Vertical selected and has Position 0 in.


3rd Step : Grab the Move Tool.
Take the Move tool from the Tool Bar or just by Pressing V.


4th Step : Move the Guidelines.
After taking the Move tool move the Guidelines such that it is in the Centre of the Nose.


5th Step : Adjust the Image.
Press Ctrl + A and then Ctrl + T to adjust the Image. Adjust the Image until you get a perfect alignment. Then Press Enter key.


6th Step : Deselect the Selection
Deselect the Selection by going to Select > Deselect or just by pressing Ctrl + D.


7th Step : Insert 2 other Guidelines.
Insert 2 other Guidelines by going to View > New Guidelines. Both should Vertical Selected and has Position 0 in in it. Make sure that both he Guidelines runs between the eyes.


8th Step : Insert a Horizontal Guideline.
Insert an other Guideline by Pressing View > New Guideline. This time it should be Horizontal and has Position 0 in in it.


9th Step : Move the Guideline.
Take the Move Tool and move the Guideline such that it runs through the mouth.


10th Step: Horizontal Guideline through the Eyes.
Repeat the same procedure for placing a Horizontal Guidelines which runs through both the Eyes.


 11th Step : Open the 2nd Image.
 Open the other image by going to File > Open.


Image Credits Pixabay.com


12th Step : Take the Polygonal Lasso Tool.
Grab the Polygonal Lasso Tool from the Tool Bar.


13th Step : Make a Freehand Selection.
After taking out the Lasso Tool make a Freehand Selection as I have done in the Picture.


14th Step : Copy the Selection.
Copy the Freehand Selection you made by Pressing Edit > Copy or just by Pressing Ctrl + C.


15th Step : Paste it.
Paste it in the other image by Pressing Edit > Paste or just by Pressing Ctrl + V.


16th Step : Adjust the Image.
After Pasting the Image Press Ctrl + T to free transform and adjust the Picture until it perfectly fits to the Guidelines.


17th Step : Decrease the Opacity.
On the bottom right corner you can see the Opacity levels. Decrease it until it perfectly matches.


18th Step : Remove the Guidelines.
Remove all the Guidelines by Pressing View > Clear Guidelines.


19th Step : Take the Eraser Tool.
Grab the Eraser tool by Pressing the Eraser Icon from the Tool Bar or just by Pressing E. With the Eraser tool remove all the Unwanted Areas. Make sure to Erase the Important Areas such as Eyes, Nose and Mouth.


20th Step : Identifying Images.
By Clicking on the Small Eye icon you can identify which are the images
so that it will be easy for the Erasing Process.


21st Step : Merge the Layers.
Now you re almost done. Click on all the Layers and Right Click Press Merge Visible.


22nd Step : Save the Final Image.
Save up the Final Image by Pressing File > Save As....


Now you are done. You have successfully added Age Progression Effect to your Picture. If you have any queries please  leave it in the comment section.


Friday, August 2, 2013

How To Make A Water Reflection Effect In Photoshop

Create a naturalistic water reflection effect with new Photoshop Cs6 elements. This will work in almost all the versions of Photoshop. For this effect  image size is important. This takes a pretty much time for the user to do it. You can use any of your photos for this effect, and I’ll be using the Burghley house. Ok so let’s get started.


1st Step : Open up the image.


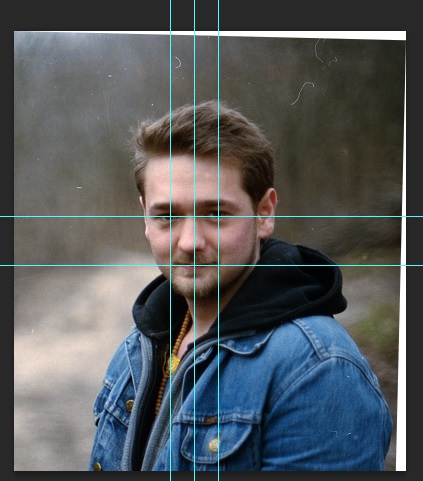
 2nd Step : Image size is important for this tutorial, so I’ll just crop off the image. Remember that the height is less and Breadth higher. You can use the crop tool for cutting, simply press C for the crop tool.


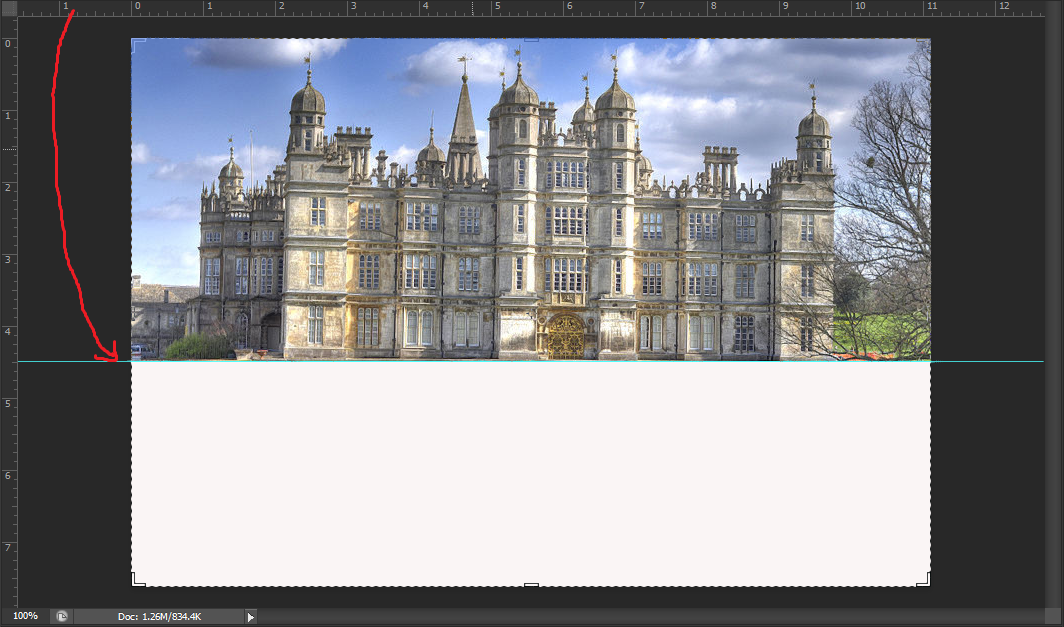
 3rd Step : After you have successfully cropped your image, go to Image/ Canvas size.


 4th Step : After the Canvas size box pop ups, change inches to percent and up arrow on anchor. Height 150 – 200 according to you image, I’ll use 170 for my image.


 5th Step : Now go to Layer/ New/ Layer via copy and create a new layer.


 6th Step : Go to View/and make sure Rulers and Snaps are checked.


7th Step : Grab the ruler and place it in the middle of the image and press Enter.


8th Step : Select the Rectangular marquee tool from the tool bar or simply press M.


9th Step : Now make a selection of the image not the white background.


10th Step : Again go to Layer/ New/ Layer via copy.


 11th Step : And a copy of it by Ctrl + J.


12th Step : Now press Ctrl + t, and drag the selection to the middle of the white background.


13th Step : After that Drag the layer 2 copy between layer 2 and layer 1 and name it Reflection.


14th Step : Name the top Layer as your wish.


 15th Step : Delete the Layer 1 .


16th Step : Click on Reflection layer and press Ctrl + J.


17th Step : While you have clicked the Reflection copy layer, go to Filter/ Blur/ Motion Blur.


18th Step : Make the angle 90 degrees and distance 35.


19th Step : Merge the two layers , Reflection and Reflection copy by Ctrl + click on both Layers , right click Merge visible. After you have merged you will have only the Background left.


20th Step : Again create a new layer by going Layer/ New/ Layer via copy.


  21st Step : Grab the Smudge tool from the tool bar


 22nd Step : Make sure the hardness is set to 0 and Strength is set to 10 and start coloring over the water reflection to get a natural look.


.
 23rd Step : Now create a new Layer by going Layer/ New / Layer via copy.


 24th Step : Make sure white is the background color not the foreground color and press Ctrl + del.


 25th Step : Now to Filter/ Noise/ Add noise.


 26th Step : Make sure the amount is 400 and Monochromatic checked.


27th Step : Now go to Filter/ Blur/ Motion Blur.


 28th Step : Make the angle 0 and distance 50.


 29th Step : Go to Image/ Adjustments/ Levels.


 30th Step : After the Level box pop ups ,type left 147, middle 1.53, right 219.


31st Step : Now grab the Zoom tool from the tool , or else simply press Z.


32nd  Step : Now right click and Zoom out.


33rd Step : Press ctrl + t and go to Edit / Transform / Perspective.


 33rd Step : Go to a bottom corner and drag out and to a top corner and drag in and press enter.


 34th Step : Now press Ctrl + 0 , to get the actual size of the picture.


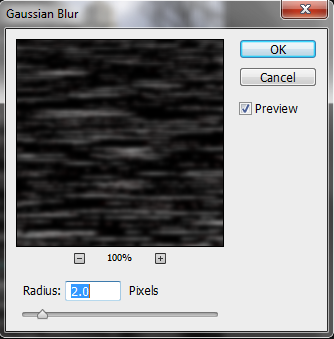
 35th Step : Go to Filter/ Blur/ Gaussian Blur.


 36th Step : Make the Radius 2.0 pixels.


 37th Step : Click on layer 1 and make a copy of it by pressing ctrl +J.Make it not visible.


 38th Step : Click on Layer 1.


39th Step : Change the blend mode to soft light and opacity 35%.


40th Step : Make the layer 1 copy visible and click on it.


41st Step : Press Ctrl + i. You should get a picture like this.


 42nd Step : Now change the blending mode to Overlay and Opacity 30.


 43rd Step : After that take the move tool and press down arrow on keyboard to move the shadows down. You can take the move tool by pressing V.


44th Step : Now grab the Blur tool from the tool bar.


45th Step : Make sure the Hardness is 0 and strength is 100 and start coloring over the bottom of the water reflection. Do this for both Layer 1 and Layer 1 copy.


46th Step : Click on Layer 1 copy and press Ctrl + shift + alt + e.


It should bring a new layer.


47th Step : Take the Gradient tool from the tool bar.


 48th Step : Make sure you have selected all the like the picture below.


 49th Step : Go to the middle bottom of your image and press shift and drag up the gradient to the middle of your photo.


 50th Step : Reduce the Opacity to 30.


 51st Step : Now press Ctrl + H to hide the guide line.


52nd Step : Finally merge all the layers to get a final layer. For doing that Ctrl + clicking on the all the layers, right click merge visible.


53rd Step : Now you’re done, you can save your image. If you have any doubts leave it in the comment bar J.