In this tutorial, I will
show you how to change hair color and add contact lenses in Photoshop. This
will basically work for all the versions. This tutorial will not take long time
for the user to do it. If you want some new brushes for applying contact lenses
you can download it from Google.
So now lets get started.
So now lets get started.

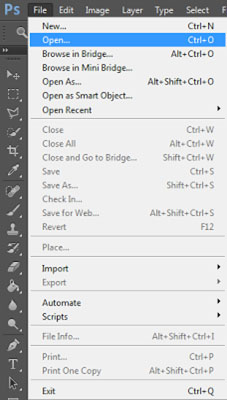
Open the Image which you are going to edit by going to File > Open
or just by Pressing Ctrl + O.
 |
| Image Credits Pixabay.com |
Create 2 New Layers for the Image by Pressing he Small New Layer Icon on the bottom right corner double times.

3rd Step : Select Layer 1.
Click on Layer 1 to select it.
Click on Layer 1 to select it.

4th Step : Take the Brush Tool.
Grab out the Brush tool from the Tool bar or just by pressing B.
Grab out the Brush tool from the Tool bar or just by pressing B.

5th Step : Zoom in.
And now Zoom into the Eyes by taking the Zoom tool or by Pressing Z.
And now Zoom into the Eyes by taking the Zoom tool or by Pressing Z.
6th Step :Change the Color.
You can pick a color by Pressing Color Picker and you can change the size of the brush by Right clicking. Make sure the hardness in set around 0 and Opacity is set around 100.
You can pick a color by Pressing Color Picker and you can change the size of the brush by Right clicking. Make sure the hardness in set around 0 and Opacity is set around 100.
7th Step : Start Coloring.
Now start coloring as I did on the picture to the both eyes with your favourite colors.
Now start coloring as I did on the picture to the both eyes with your favourite colors.

8th Step : Change the Blending Mode.
To give a Natural look to the Picture change the blending mode from Normal to Soft light.
To give a Natural look to the Picture change the blending mode from Normal to Soft light.

9th Step : View the Changes.
Now you have added Contact Lenses to your image.
Now you have added Contact Lenses to your image.

10th Step : Move to Hair Coloring.
Now we’ll see how to change the hair color. Click on the Layer 2.
Now we’ll see how to change the hair color. Click on the Layer 2.

11th Step : Take the Brush Tool.
And now again take out the brush from the Brush tool or simply by pressing B. With the same setting Hardness 0 , Opacity 100 Start coloring the Hair. You can also select a color by Color Picker.
And now again take out the brush from the Brush tool or simply by pressing B. With the same setting Hardness 0 , Opacity 100 Start coloring the Hair. You can also select a color by Color Picker.
12th Step : Start Coloring.
Start Coloring with your desired Color until you cover the whole Area.

13th Step : Change the Blending Mode.
To give a natural look change the Blending Mode from Normal to Softlight.
14th Step : View the Changes.
Now you have changed the Hair Color in your Picture.

15th Step : Merge 2 Layers.
Now are almost done, combine the 2 Layers together by Press and hold Ctrl and Right click Merge Visible.

16th Step : Save the Image.
You have successfully changed hair color and Applied Contact Lenses. Now save you image.
You have successfully changed hair color and Applied Contact Lenses. Now save you image.

That's it you are done. You have Successfully added Contact Lenses and changed the Hair Color in your Image. If you have any queries please leave it in the comment section.
It is really a helpful blog to find some different source to add my knowledge. I came into aware of new professional blog and I am impressed with suggestions of author.เลนส์โปรเกรสซีฟ
ReplyDeleteThis was really an interesting topic and I kinda agree with what you have mentioned here! lasik eye surgery for diabetics
ReplyDeleteThanks for taking the time to discuss this, I feel strongly about it and love learning more on this topic. If possible, as you gain expertise, would you mind updating your blog with extra information? It is extremely helpful for me. Image background removal service
ReplyDeleteYour article provide me huge knowledge related to Cliping path services.
ReplyDeleteThanks for sharing this post.professional photoshop services
Thanks for taking the time to discuss this, I feel strongly about it and love learning more on this topic. If possible, as you gain expertise, would you mind updating your blog with extra information? It is extremely helpful for me. Photo retouching
ReplyDeleteI’m glad it helped!
ReplyDeleteBest Regards,
clipping path service provider